
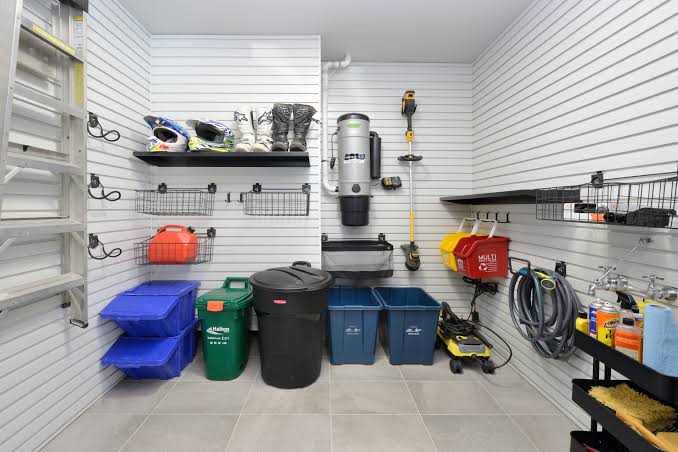
If your garage has become a museum of half-used paint cans, broken lawn chairs and boxes you swear you’ll sort someday, you’re in good company. For many families, the garage is where things go when we don’t know what else to do with them. The car, meanwhile, sits in the driveway.
The good news is that you don’t need a fancy custom system to fix it. With a weekend, some creativity and a modest budget, you can reclaim your garage. Here’s how.
Step 1: Empty it out
Yes, everything. It sounds like a lot, but pulling it all onto the driveway lets you see what you actually own. Pick a dry day, lay out tarps and sort items into groups.
It also lets you clean. Sweep the floor, wipe down shelves and look for signs of leaks, pests or moisture before you put anything back.
Step 2: Declutter without mercy
Use four piles: keep, donate, sell, trash. Ask these questions:
- Have I used this in the last year?
- Is it broken beyond reasonable repair?
- Do I have a duplicate?
- Would I buy this again today?
Donate usable tools and furniture. Sell valuable items online to fund your organizing budget. Dispose of hazardous materials, such as old paint, solvents, batteries and chemicals, according to your local waste rules, not in regular trash.
Step 3: Create zones
Group like with like so you can find things fast. Common zones include:
- Tools and DIY. Hammers, drills, screws and measuring tapes.
- Garden and yard. Rakes, hoses, fertilizer and pots.
- Sports and outdoor gear. Bikes, balls, camping equipment.
- Seasonal and holiday. Decorations and winter gear.
- Cleaning and car care. Wash supplies and motor oil.
Give each zone a spot, and keep items you use most within easy reach, ideally at waist to shoulder height.
Step 4: Go vertical
Floor space is precious. Walls and ceilings are free real estate.
- Pegboards. Inexpensive and endlessly customizable for tools.
- Wall hooks and rails. Perfect for ladders, bikes, hoses and extension cords.
- Overhead racks. Great for seasonal bins you only need once or twice a year.
- Shelving units. Metal or heavy-duty plastic shelves are affordable and sturdy.
Anchor tall shelves to the wall studs for safety, particularly if you have children.
Step 5: Use affordable containers
Clear plastic bins let you see what’s inside, and labels make everything easier. Use stackable bins for similar items and smaller containers or old jars for screws and nails. Mark each bin with a simple label like “Camping” or “Holiday lights.”
Step 6: DIY on the cheap
If you’re handy, a few boards and brackets can become a sturdy shelf for far less than store-bought. Repurposing old furniture, such as a bookcase or dresser, works well for storing tools and supplies. Magnetic strips on the wall hold metal tools, and PVC pipe pieces can organize long-handled items.
Step 7: Protect against hazards
Store chemicals, sharp tools and heavy items on high shelves or in locked cabinets away from children and pets. Keep flammable items away from water heaters, furnaces and other heat sources. If your garage has a fuel-burning appliance, make sure walkways stay clear.
Step 8: Keep a clear path
Leave a clear route to doors and the main exit. This is a basic safety rule that also helps in emergencies.
Step 9: Maintain it
Organization only works if it lasts. Try this simple routine: five minutes of tidying after each project, and a quick monthly check. If something doesn’t have a home, either create one or let it go.
Rough budget
Many garages can be organized for a few hundred dollars or less using pegboards, a couple of shelves and bins. You can lower the cost further by selling unwanted items and reusing what you already own.
Final thoughts
An organized garage isn’t about perfection. It’s about being able to find the screwdriver on the first try and fit the car inside. Start small, do one zone at a time, and enjoy that satisfying moment when you finally park in your own garage.